
This is how I trim my Tradescantias to get a full-looking plant

Hi plant people!
Ever wonder why your Tradescantia isn’t as big and full as those Insta-perfect ones? Or maybe you’re a bit scared you’ll hurt your plant by cutting?
Don’t worry, this newsletter’s got you covered! I’m here to share all my best tips on how to trim your Tradescantias! Let’s have a look at what you can do to make your plant look its best!

How often should you trim your Tradescantia?
There are many factors that determine the right time to trim. It depends on the type of Tradescantia you have, how you want it to look, and how fast it’s growing. The most important thing to consider is the number of nodes each stem has. You’ll want to leave at least one node on the plant, and you need a couple of nodes on your cutting to be able to replant it. After that, it’s up to you when you want to trim.
What is a node? It’s the growth points on the stems. Where there’s a leaf, there’s a node. It’s from these points that new growth and roots grow.
Do I have to trim my Tradescantia?
Yes! Tradescantias are not really meant to be kept as trailing plants in pots. In their natural habitat, they are ground-crawling plants, spreading along the surface and rooting wherever they touch. This means they’re not well-suited to having long stems that only attach to the soil at one point. When a stem becomes too long, it will lose its lower leaves, and the stem will become weak and break easily. When this happens depends on the type of Tradescantia and the plant’s overall health. So, if you’re noticing a lot of brown leaves at the bottom of your plant, it doesn’t necessarily indicate a problem; it just means that it might be time to start over.
What you’ll need:
Sharp scissors.
That’s it! For almost all Tradescantias, there’s no need to propagate the cuttings in water first, making the trimming process much simpler!
How to trim:
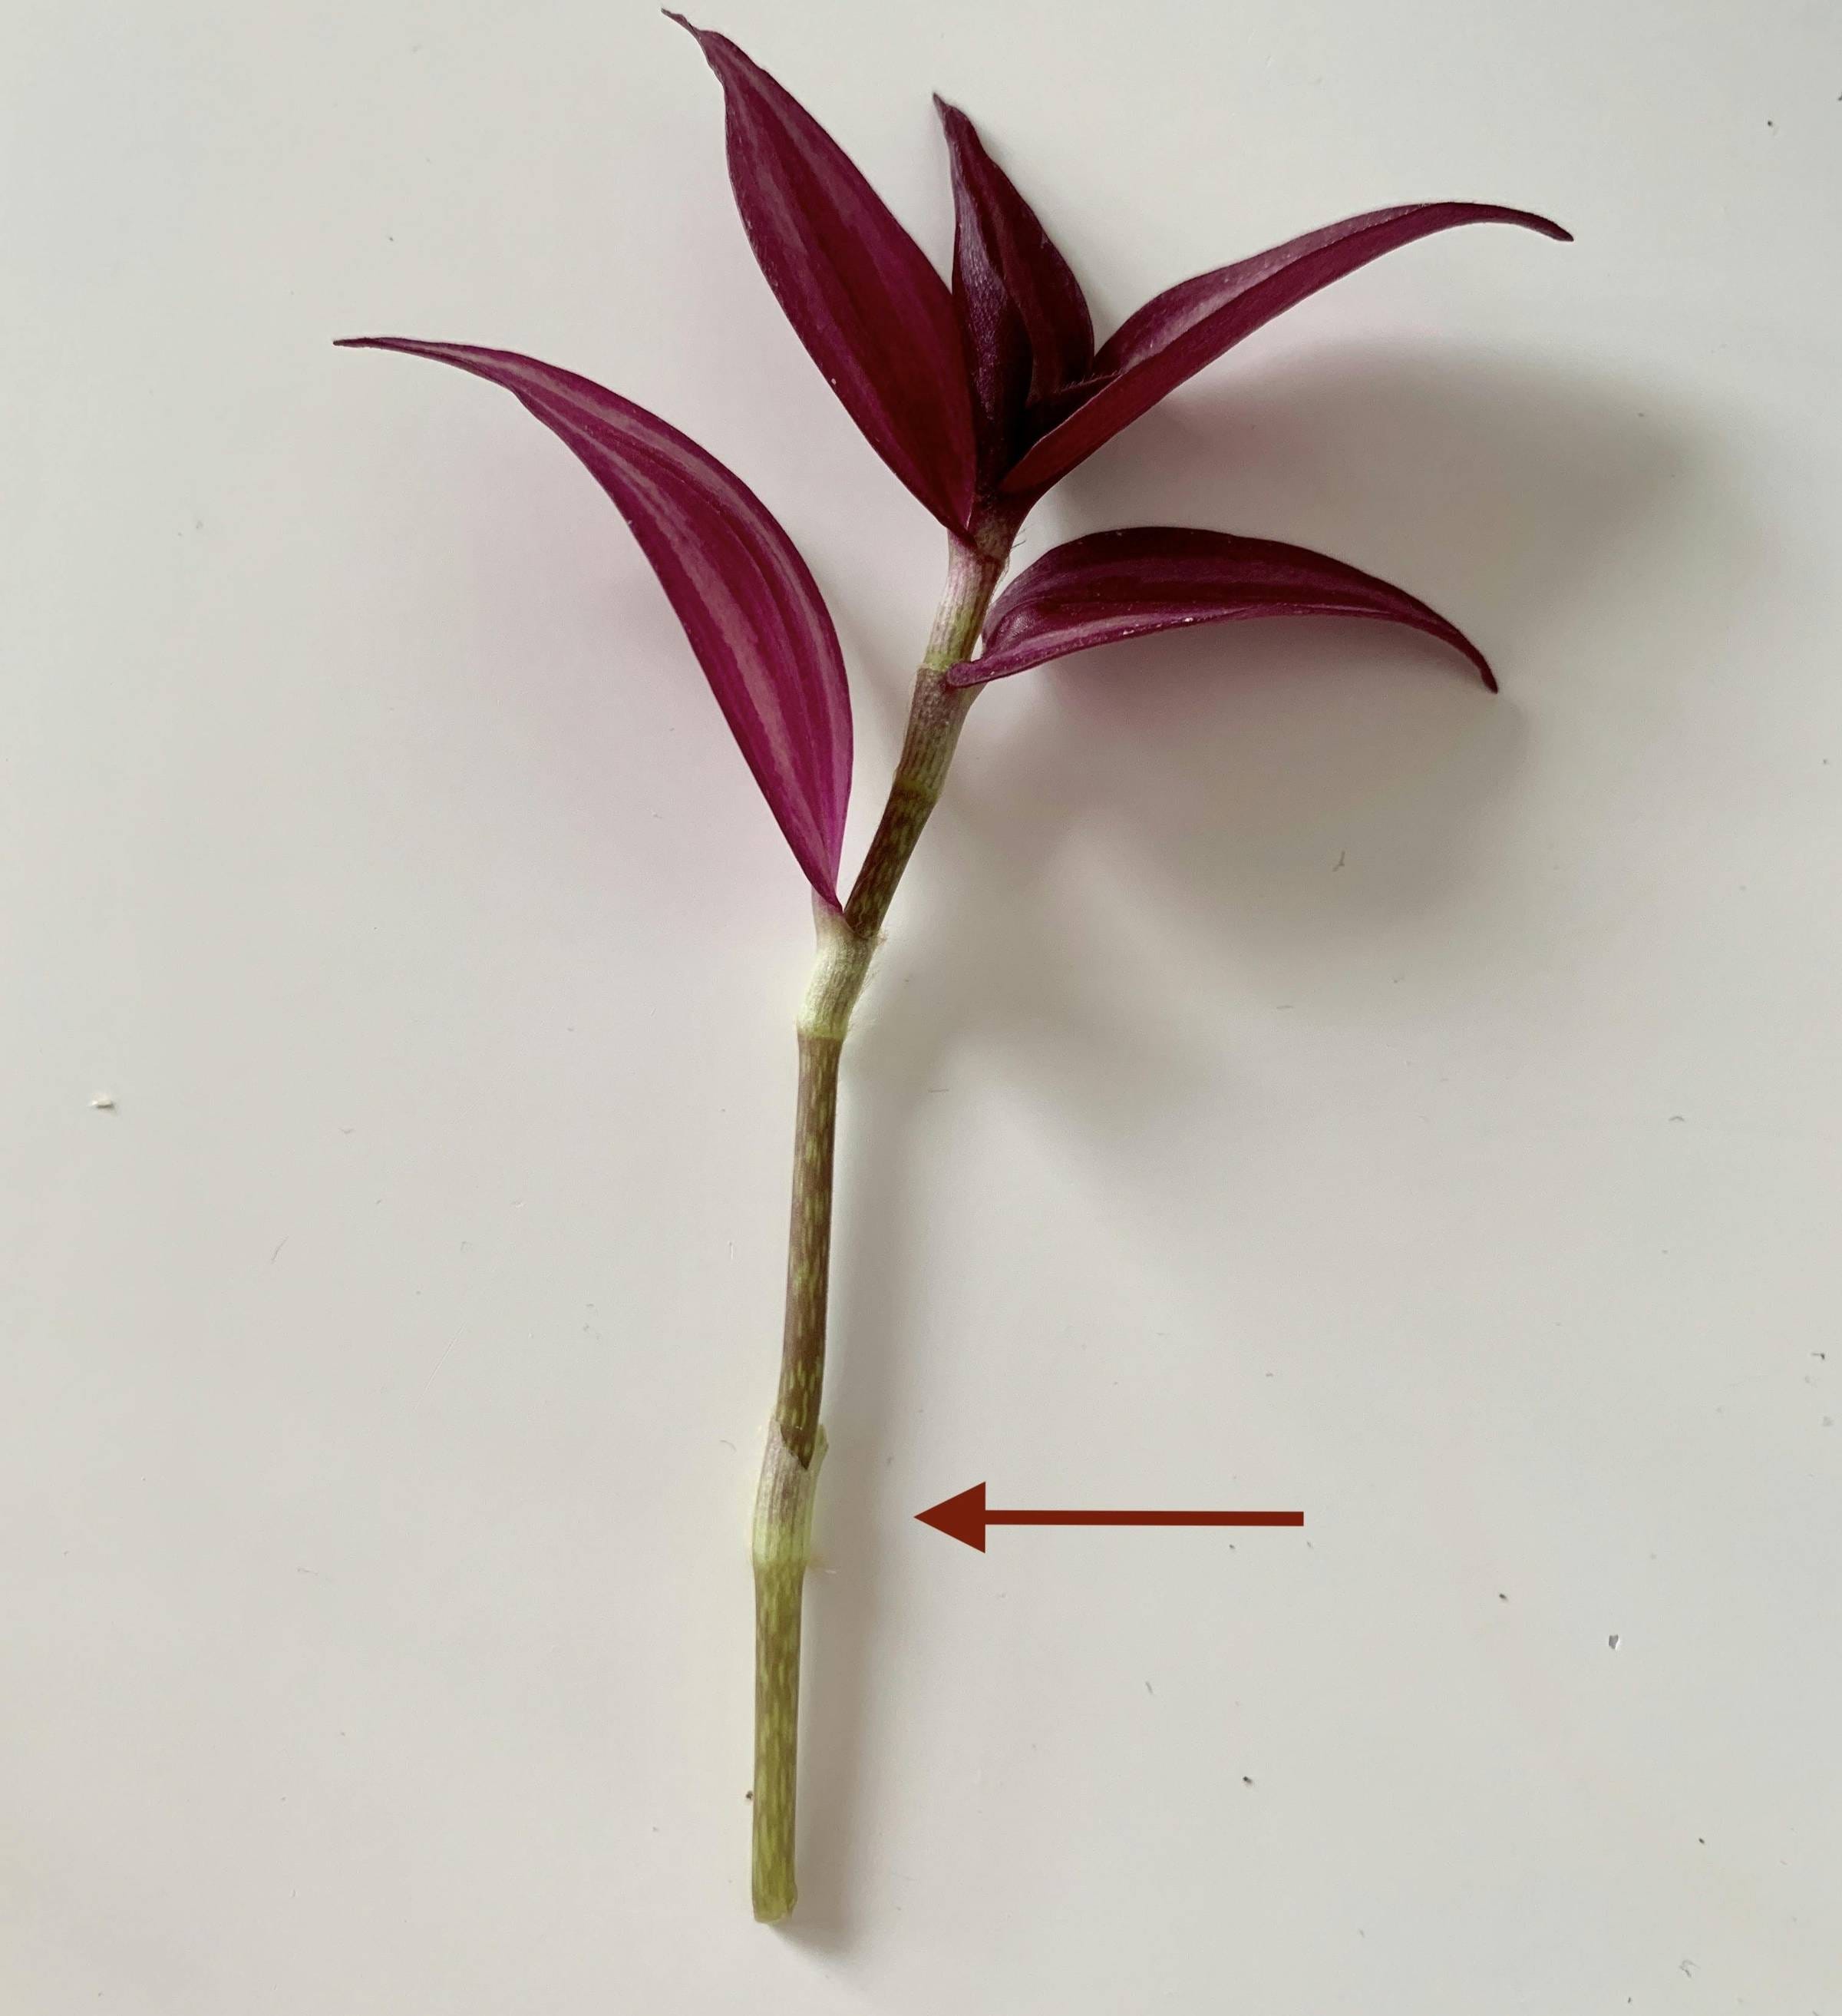
I cut the stem just above the first node. You’ll want to save one or two nodes so that new growth can sprout from these.
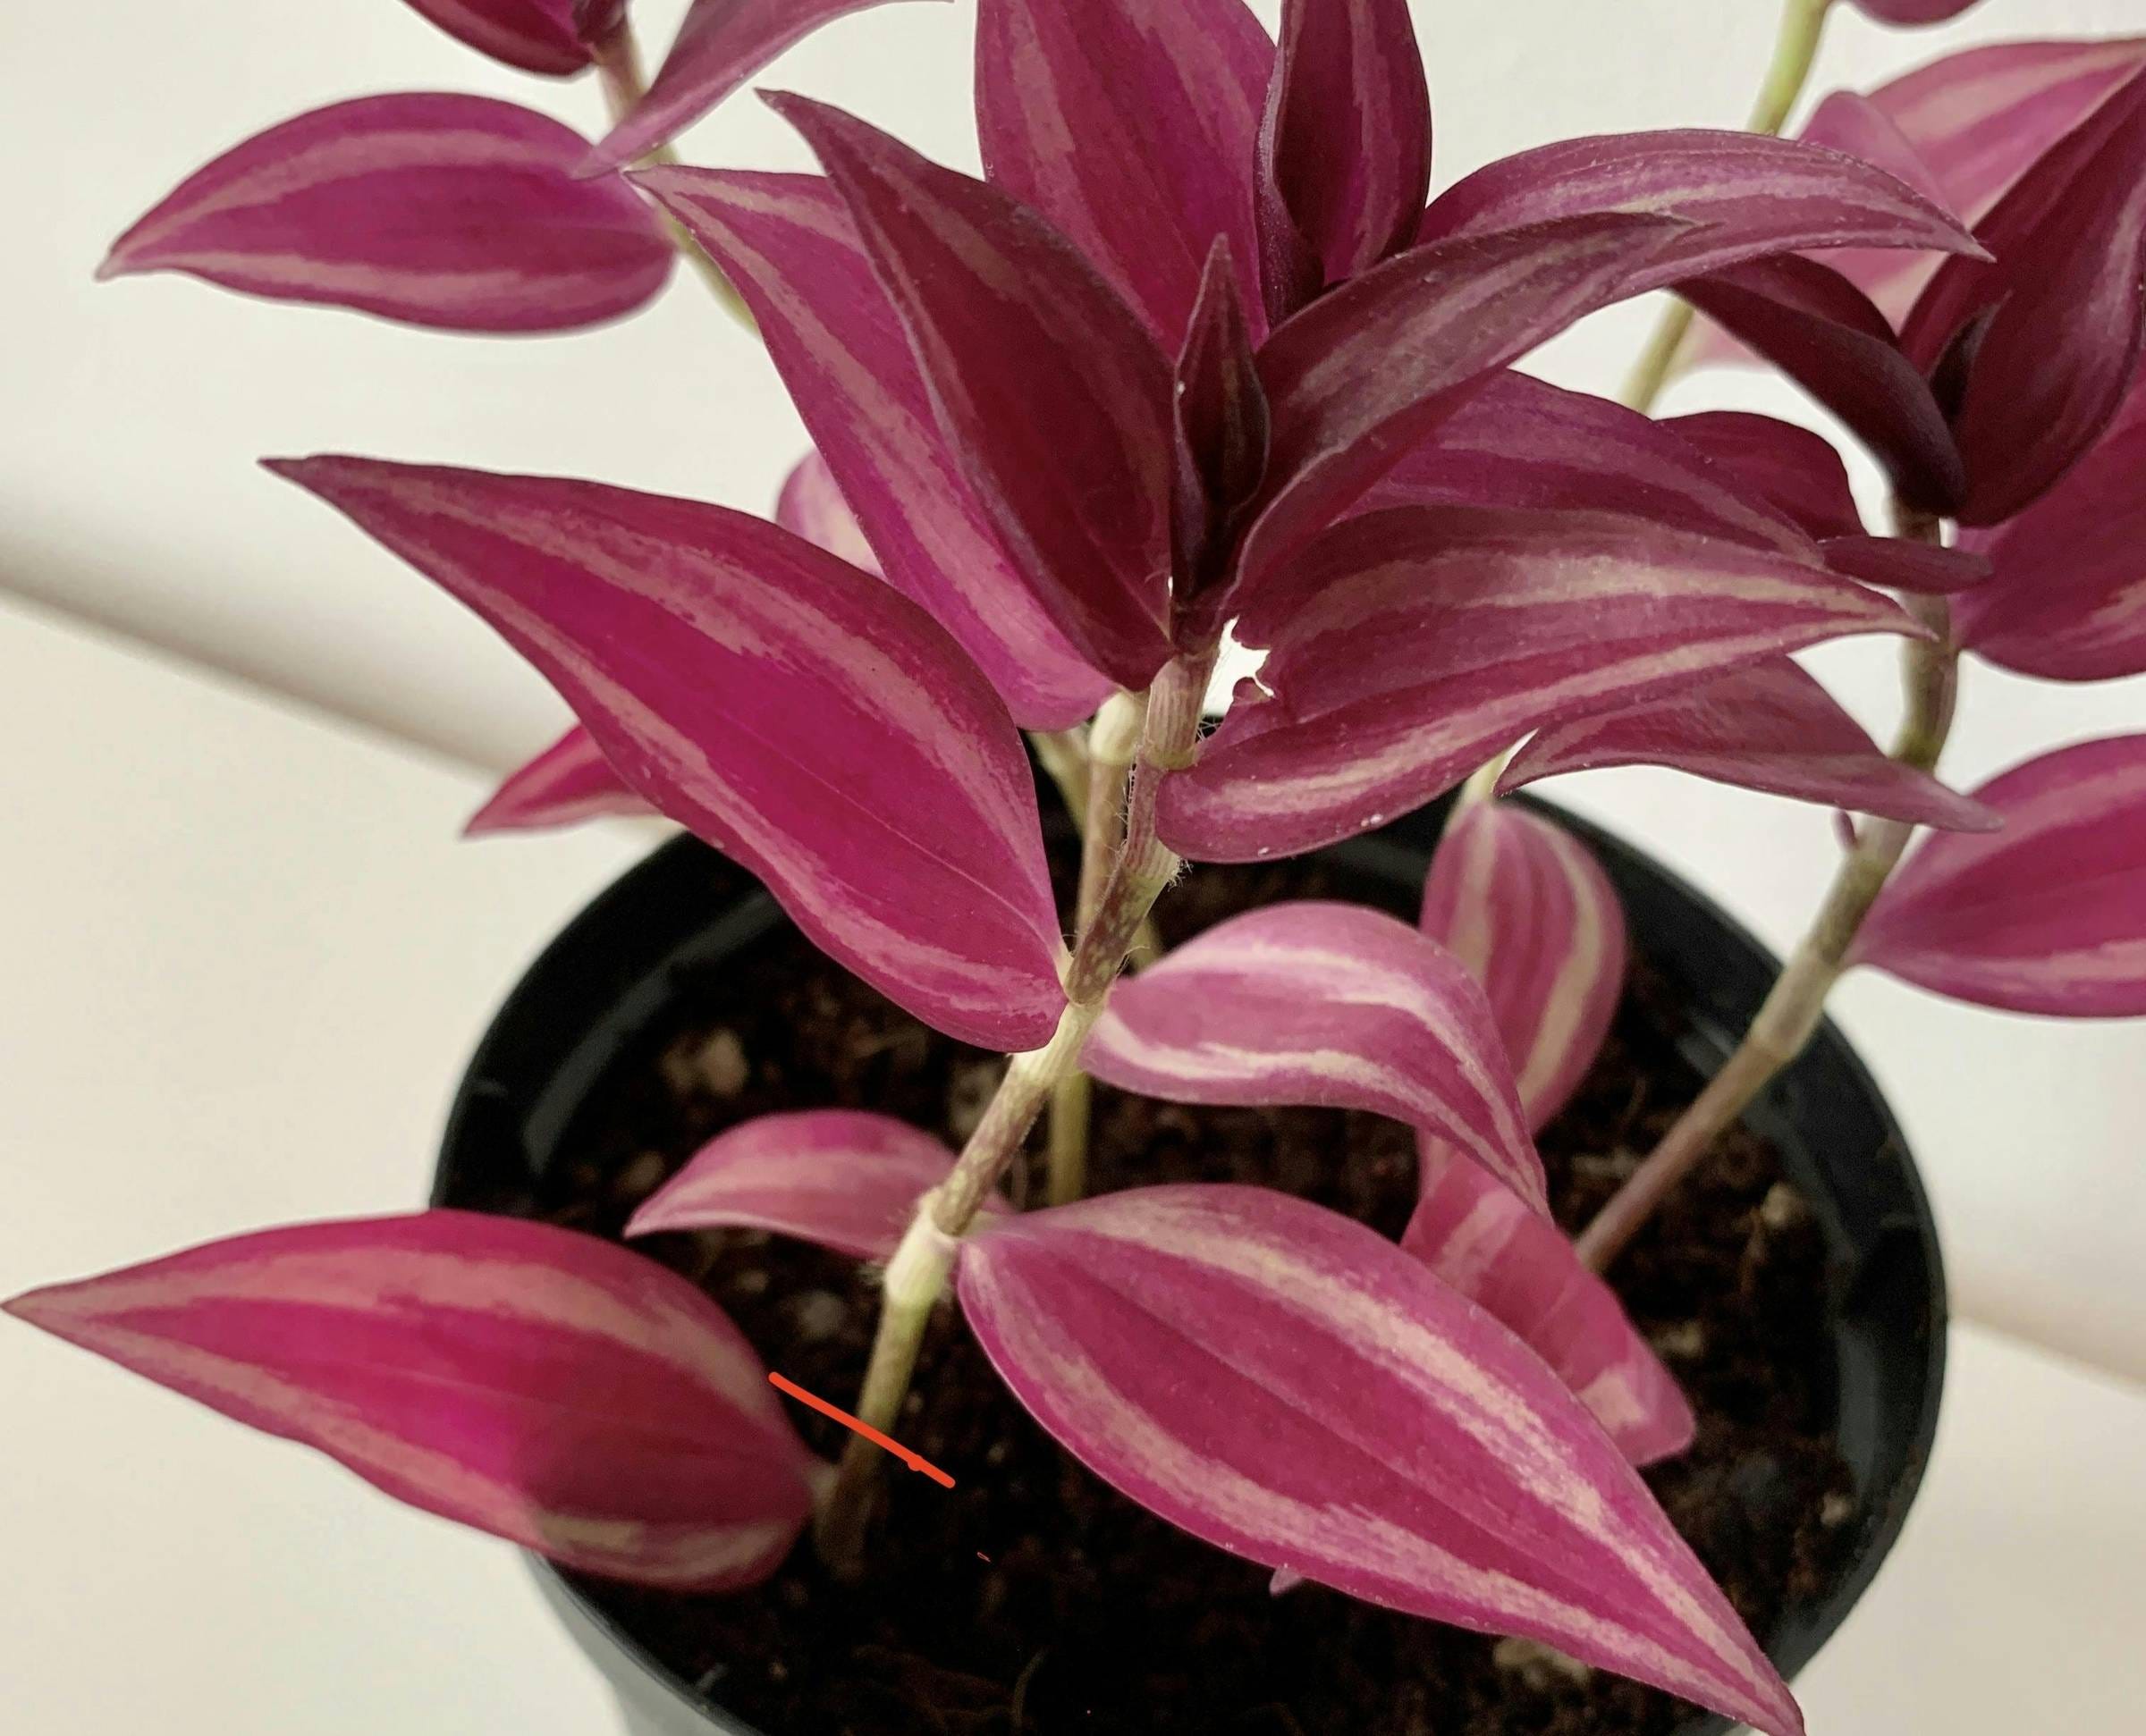
To get a full-looking plant, I prefer to trim all the stems that have enough nodes and are long enough at the same time.
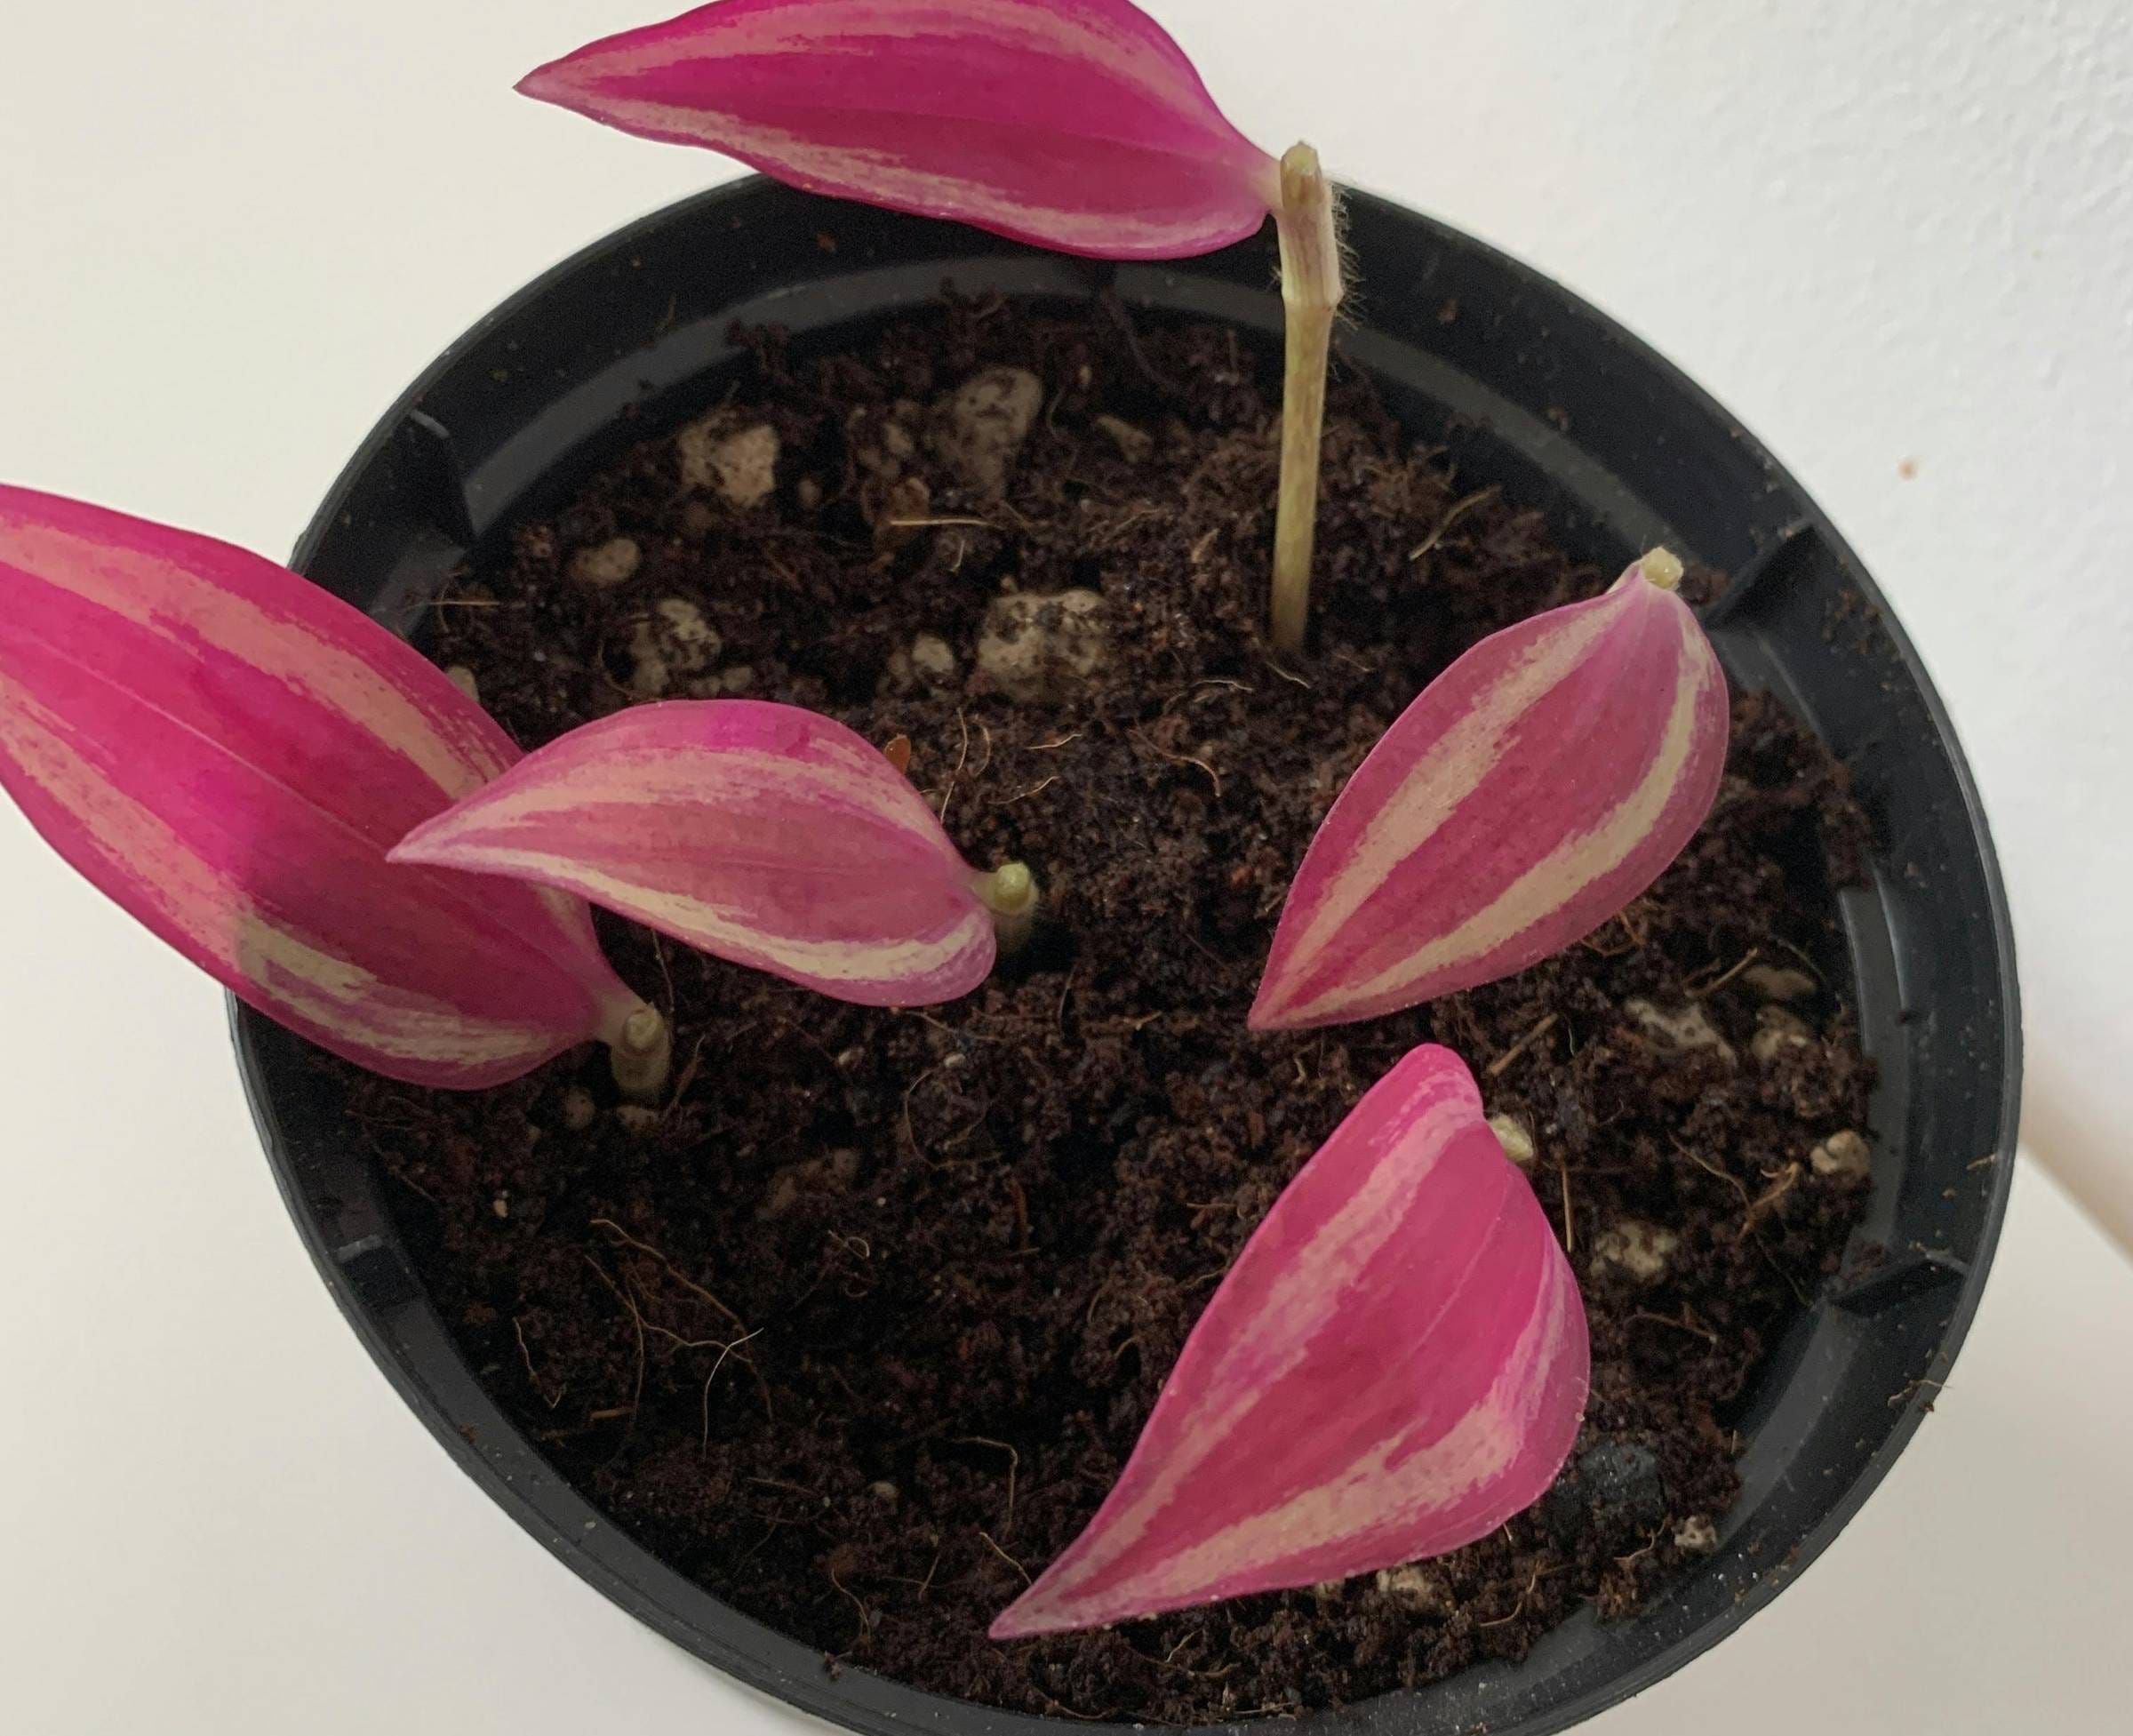
Then, I remove the lowest leaf from the cutting and place the cutting back into the pot.
I make sure the soil is moist during the first week after planting the cuttings.
And that’s all there is to it. Repeat this process until you get the lush, full-looking plant you want!

Things to consider:
It’s important to make sure that at least one node is buried in the soil, and you should remove the leaf from that node. A cutting left with the leaf attached will have a hard time growing new roots, and the leaf will rot.
If the stem below the lowest node is quite long, you can trim it off just below the node.
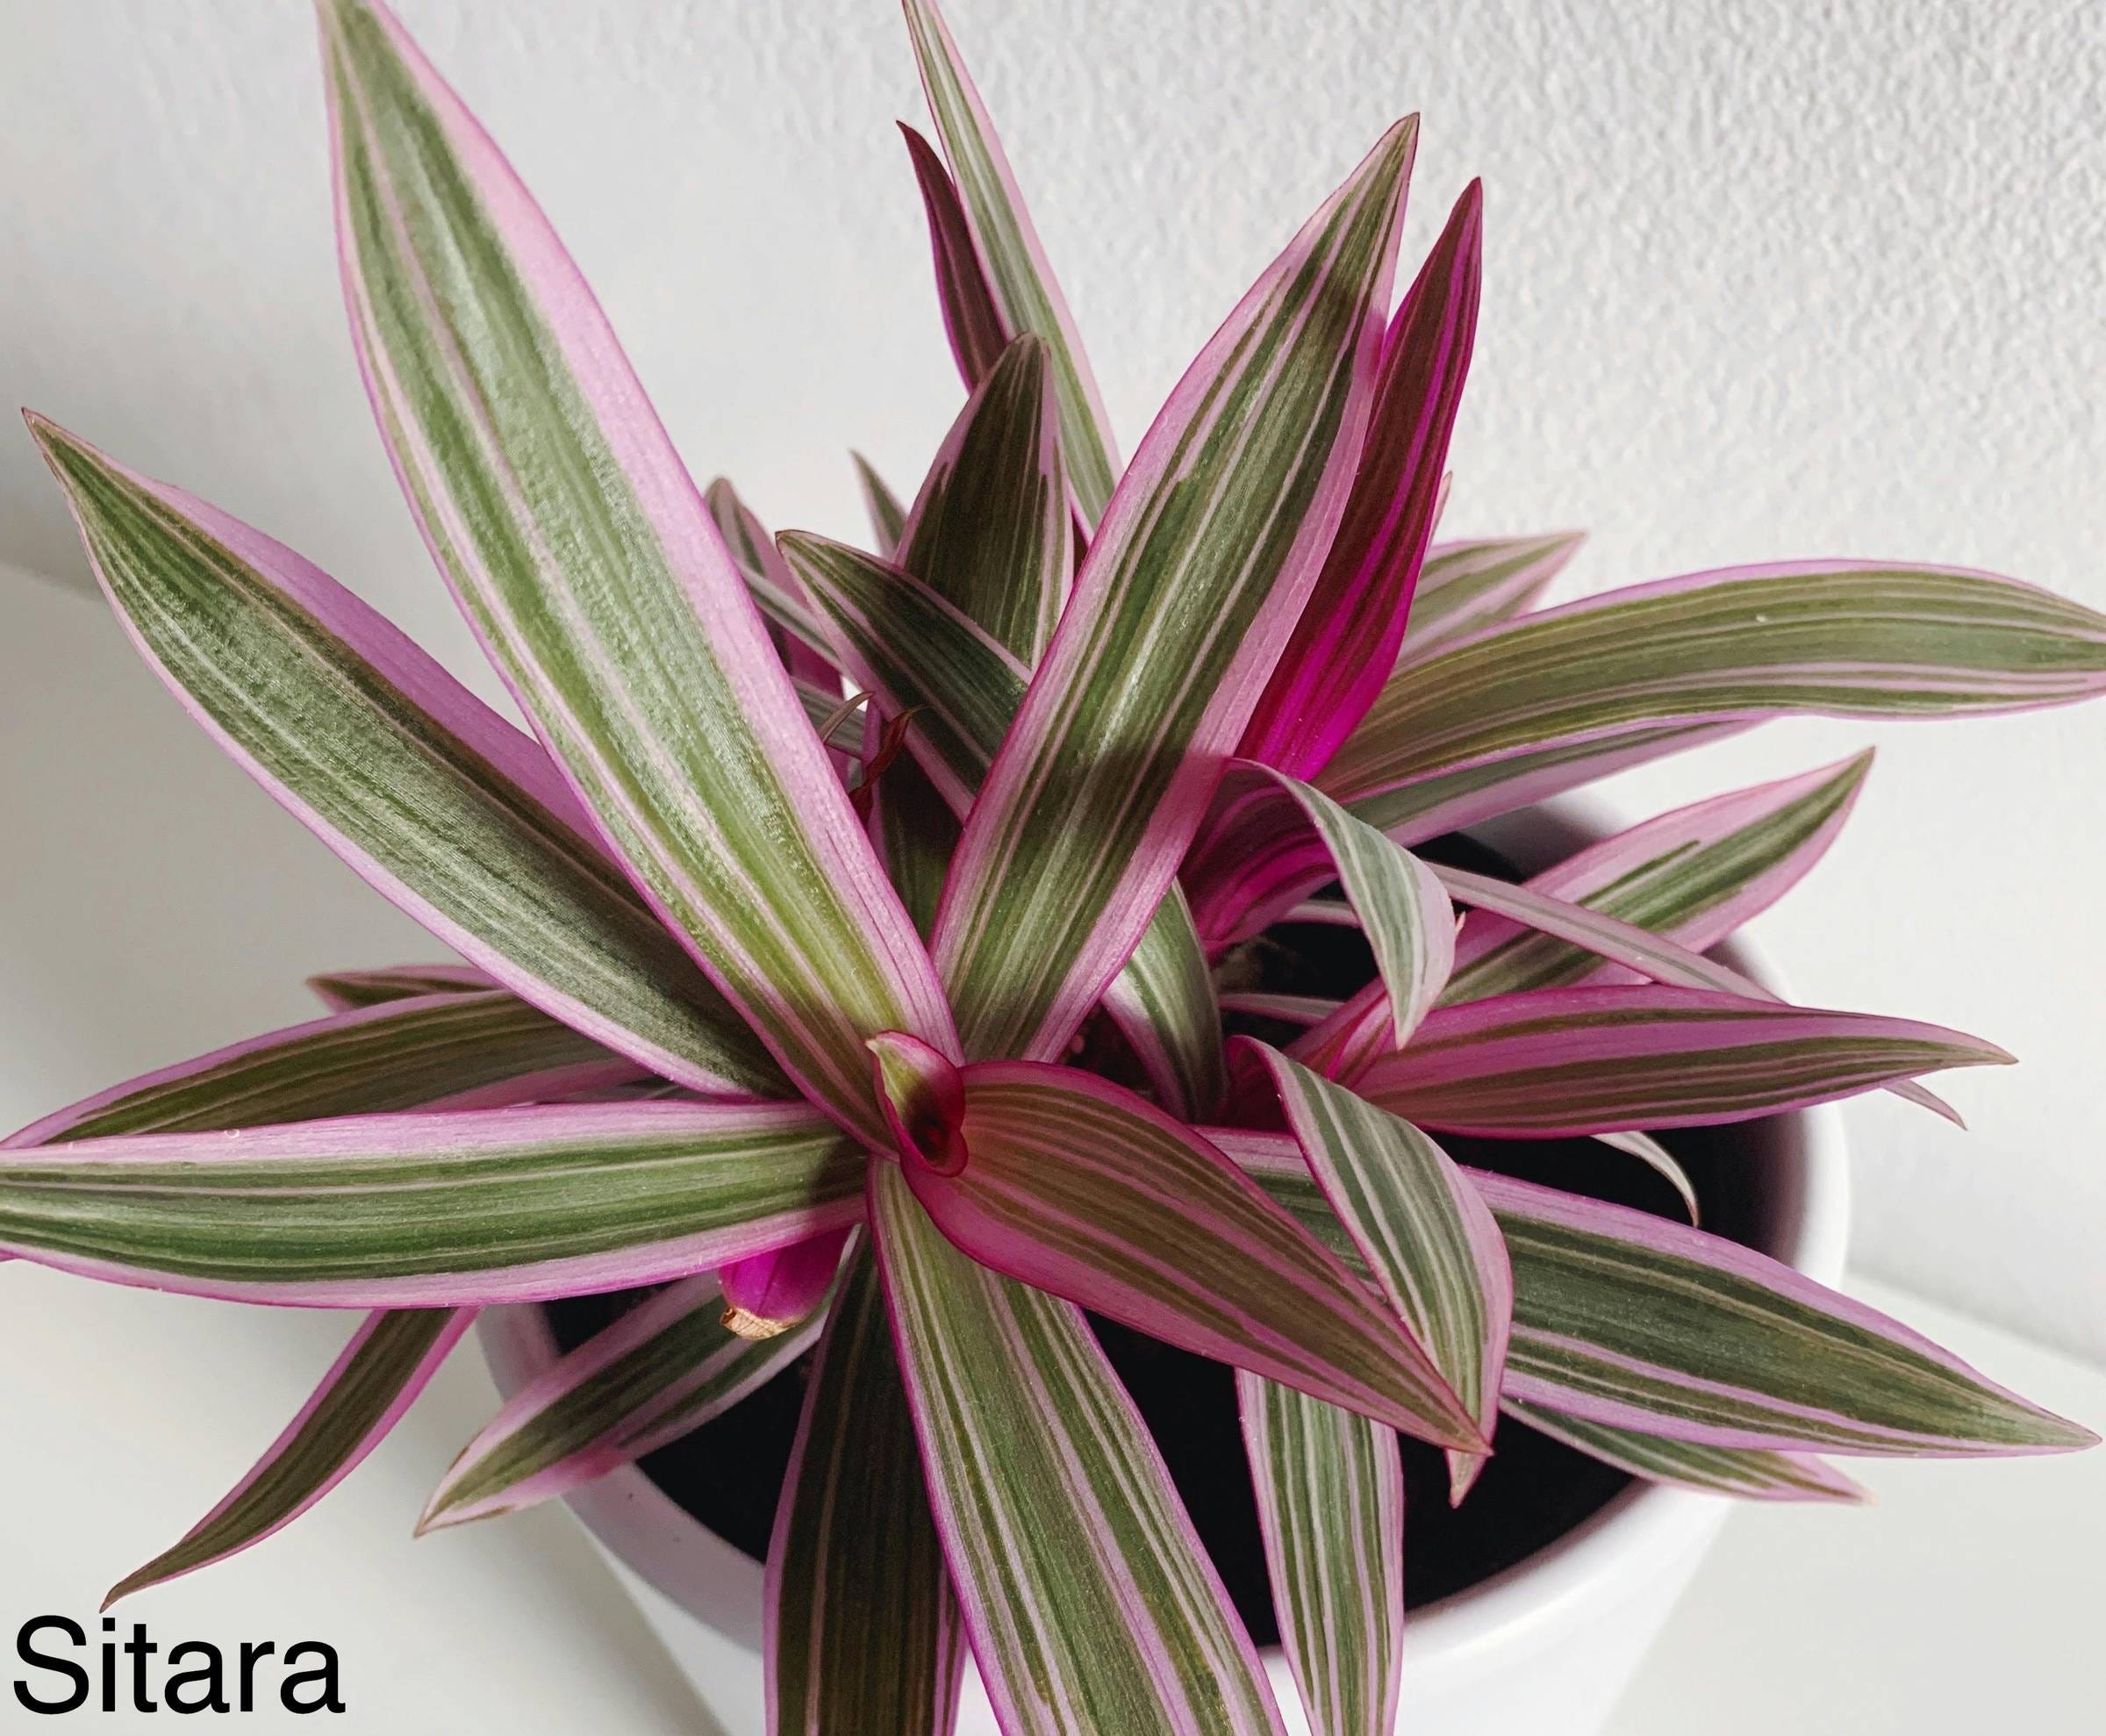
Trimming a Tradescantia Spathacea:
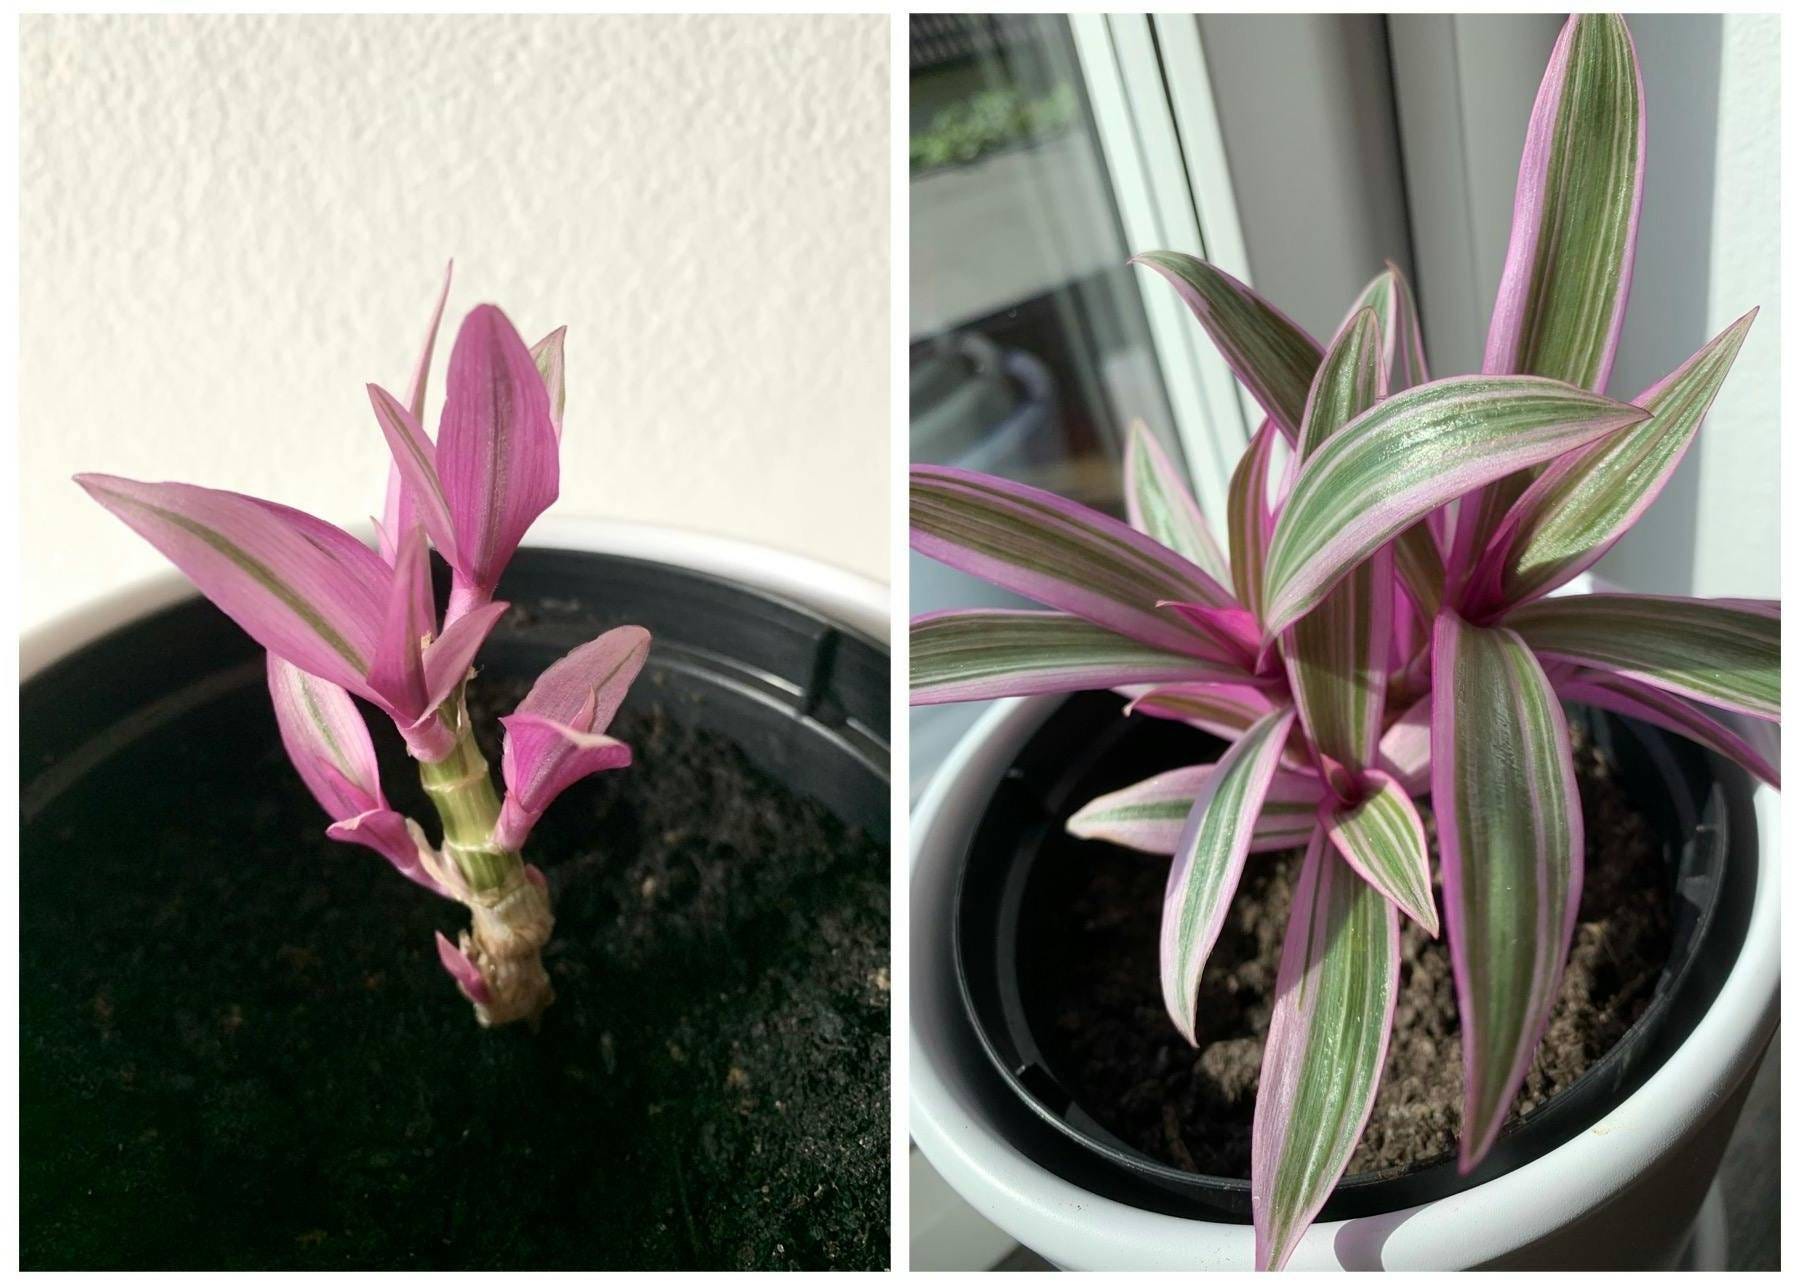
Trimming your Spathacea differs a bit from other Tradescantias. It’s not needed as often, and if it’s getting enough light to form a compact rosette, I don’t replant the cutting in the same pot.
With these, I prefer to wait until they’ve grown a bit more, so I can leave a couple of nodes on the stem still in the soil. Then, I simply cut it in half and replant the top in a new pot.
The stump will sprout new shoots and eventually grow into a big, full-looking plant. With the top half, I repeat the process.
So there you have it! I hope this guide has been helpful. You can trim your Tradescantias anytime throughout the year, as long as they’re actively growing. The only time you need to be careful is if your plant is weak or unhealthy for some reason; in such cases, it’s better to let the cuttings root in water or sphagnum moss first.
If you have any questions, please don’t hesitate to reach out!
Until next time, happy planting!
Katja